Ready to unleash the true power of the Apple ecosystem? Look no further! Create Apple ID is the gateway to a world of limitless possibilities, no matter if you’re using Android, Windows, or an iPhone. An Apple ID is an absolute must-have for both seasoned Apple enthusiasts and those new to the experience. It opens doors to the remarkable App Store, iCloud, iTunes, and a host of other fantastic services Apple has in store for you.
Whether you’re making the exciting transition to an iPhone or already basking in the brilliance of a new iPhone or Mac, creating an Apple ID should be your top priority. In this article, we’re here to guide you through the process, ensuring a smooth and hassle-free experience as you embark on your Apple journey.
So, let’s embark on this adventure together and empower your digital life by setting up your own Apple ID today! Get ready to discover a world of innovation, convenience, and endless entertainment. The Apple universe eagerly awaits your arrival!
Contents
How to Create New Apple ID on Android
Congratulations on your new iPhone purchase! While you eagerly await its arrival, it’s a great idea to create your Apple ID in advance. This way, when you get your hands on the phone, setting it up will be a breeze. Here’s a simple guide on how to create an Apple ID on Android:
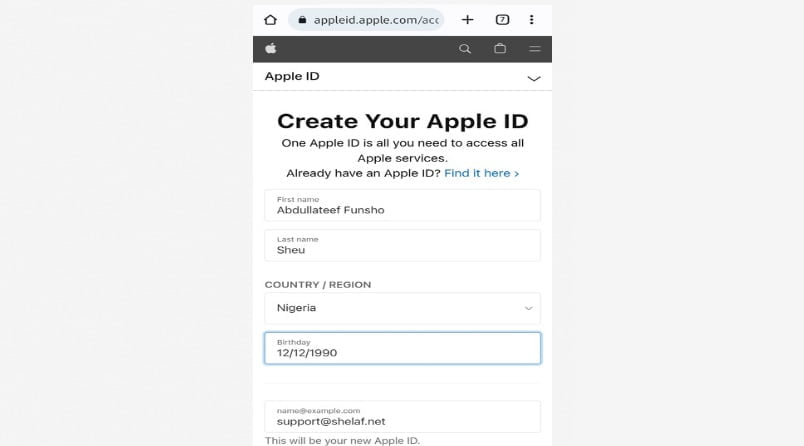
- Start by opening your preferred web browser on your Android device and navigating to appleid.apple.com/account.
- Once there, provide your first and last names, along with your “Region” and “Birthday” details.
- Next, enter your email address, create a strong password, and input your phone number.
- Click on “Continue” and follow the on-screen instructions to verify both your email address and phone number.
Fantastic! You’ve successfully created your Apple ID. Now, you can use it to sign in to various Apple services like iCloud, iTunes, the App Store, and more.
Remember, the email address you provided will serve as your Apple ID, and you can use any valid email address, whether it’s from Gmail, Yahoo, or any other provider.
Now you’re all set to make the most of your upcoming iPhone experience with your brand-new Apple ID. Enjoy exploring the incredible features and services Apple has to offer!
Apple ID creation on Windows
Creating an Apple ID on a Windows PC is a breeze, and we’ve got you covered with a step-by-step guide. While you can use the method mentioned earlier, here’s an alternative method using iTunes:
- Begin by installing the free iTunes software on your Windows PC. Once installed, open it up.
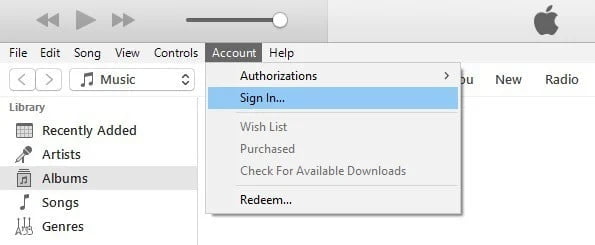
- In the iTunes menu bar, click on the “Account” tab, and then select “Sign In.”
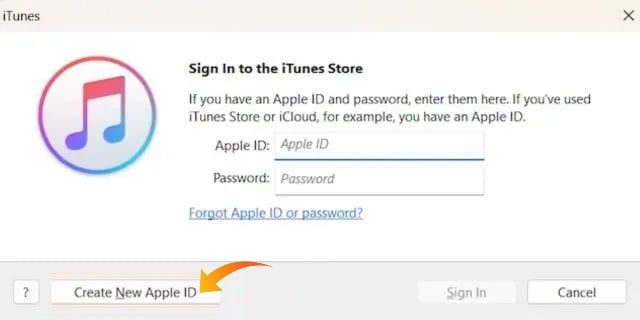
- Now, look towards the bottom left corner and click on “Create New Apple ID.”
- On the following screen, click “Continue” to proceed.
- Enter your email address, choose a strong password, and indicate your country or region. Once done, click “Continue.”
- Next, provide your name and date of birth, and then set up security questions. Click “Continue” to move forward.
- Entering your payment information is now necessary, but don’t worry—you won’t be charged just yet. This information is only required for any future purchases you may make. Once entered, click “Continue.”
- Follow the on-screen instructions to verify your email address, and voila! Your Apple ID is now ready to use across various Apple services.
Now that you have your Apple ID set up on your Windows PC, you can unlock a world of possibilities and access iCloud, iTunes, and other fantastic Apple features. Enjoy the seamless experience and make the most of your Apple ecosystem!
How to Create an iCloud Account
Creating an Apple ID via iCloud is a straightforward process. Follow these steps to get started:
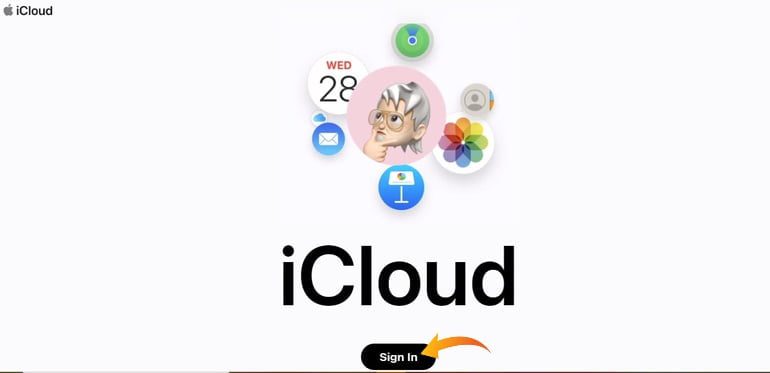
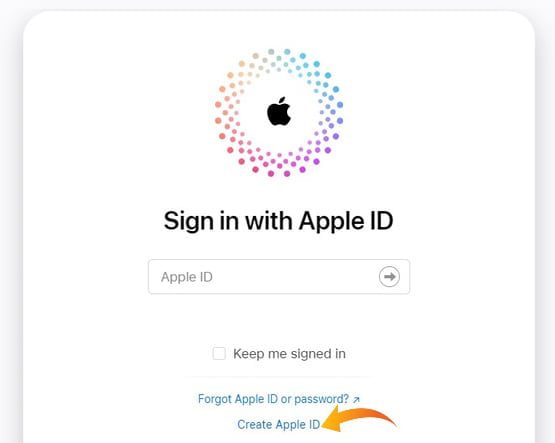
- Launch your preferred web browser and visit iCloud.com. Click on “Sign In.”
- At the bottom of the screen, you’ll find the option “Create Apple ID.” Give it a click.
- Enter your first and last names, select your device’s region, and provide your birthday.
- Next, type in your email address, create a strong password, and input your phone number.
- Click on “Continue” and carefully follow the instructions to verify both your email address and phone number.
Congratulations! Your brand-new Apple ID is now ready to use. You can utilize it to sign in to iCloud, iTunes, the App Store, and many other Apple services.
With your newly created Apple ID, you’re all set to explore the vast Apple ecosystem and make the most of its offerings. Enjoy seamless integration, convenient access, and a world of possibilities at your fingertips. Create, connect, and unlock the full potential of your Apple experience!
Also Read: Stream Your Heart Out: Enjoy 6 Months of Free Apple Music with MTN
How to create an Apple ID on an iPhone or iPad
Creating an Apple ID on your iPhone or iPad is a breeze, and we’ve got you covered with a detailed guide. There are two methods explained below: creating an Apple ID during device setup and using the App Store on your device.
- Create an Apple ID on the iPhone during set-up:
- Power on your new iPhone or iPad and select your preferred language.
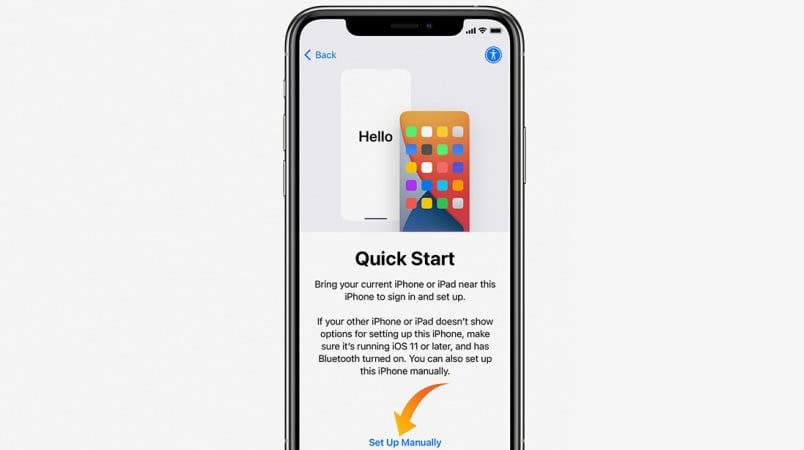
- Go to the “Quick Start” page and select “Set Up Manually.”
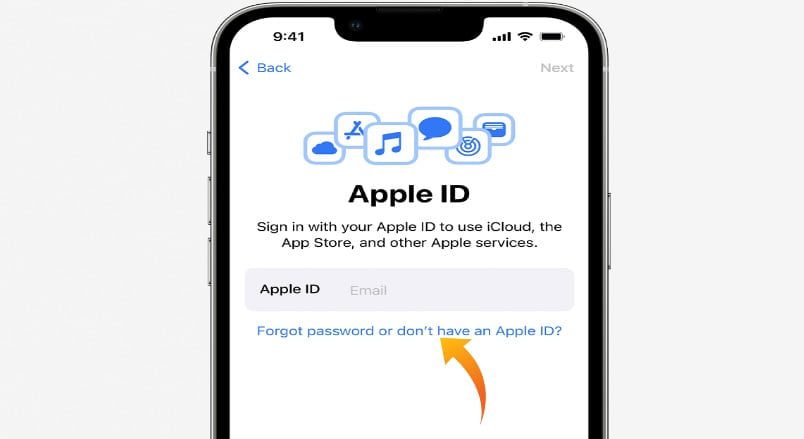
- At the sign-in page, tap on the option “Forgot password or don’t have an Apple ID?“
- Select “Create a free Apple ID.”
- Enter your name and date of birth, then tap “Continue.”
- Depending on your desire, select either “Use phone number” or “Use email address” at this point. For this guide, let’s go with the phone number option. Remember, you can always change your phone number associated with your Apple ID later if needed.
- Enter your phone number, including the country code, to create a new Apple ID. If you wish to receive emails and communications from Apple, you can enable the Announcements toggle.
- Verify your phone number by entering the six-digit code you receive on your mobile number.
- After that, you will be prompted to choose a strong password. Enter a secure password to complete the process of creating your new Apple ID.
With these steps, you’ve successfully created your Apple ID on your iPhone or iPad! Now, you can fully enjoy the seamless integration with iCloud, the App Store, and other Apple services. Explore a world of possibilities and make the most of your Apple experience. Happy exploring!
Create Apple ID on your iPhone via the App Store
If you prefer not to create a new Apple ID during the initial setup process or if you have purchased a used iPhone, don’t worry! You can still create a new Apple ID right from the App Store. Here’s how:
- Open the App Store app on your iPhone and locate the “account” icon at the top right corner. Give it a tap.
- Select “Create New Apple ID” from the list of available options.
- Follow the on-screen instructions and provide all the necessary details. Once you’ve filled everything in, tap “Next.”
- In the next step, make sure to verify your phone number and email address. That’s all there is to it!
After completing these steps, your brand-new Apple ID is ready to go. You can now enjoy the convenience of signing in to iCloud, iTunes, App Store, and other Apple services.
How to Create an Apple ID on Your Mac
Creating an Apple ID on your Mac is a breeze. Just follow these simple steps:
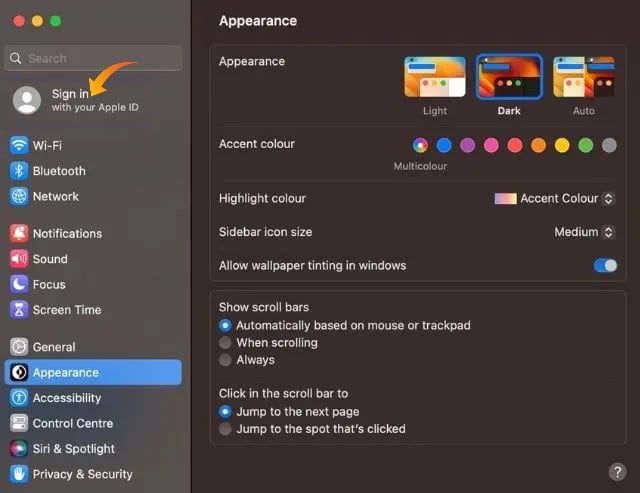
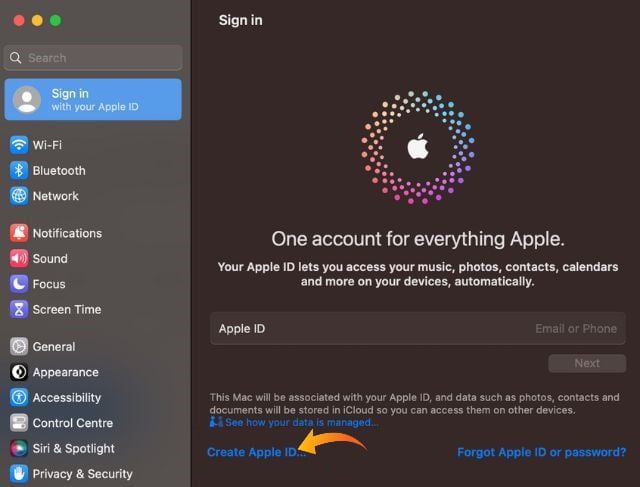
- Open the Settings app on your Mac and navigate to the “Sign In” tab located at the top.
- Next, click on the option that says “Create Apple ID.” This will initiate the process of creating your new Apple ID.
- From here, you’ll be guided through the on-screen instructions. Enter all the necessary details, and make sure to verify your phone number and email address. The procedures to be followed will be comparable to those described in the sections above.
By following these steps, you’ll have your very own Apple ID set up on your Mac in no time. Once your Apple ID is created, you can enjoy seamless access to iCloud, iTunes, the App Store, and other Apple services across your devices.
Unlock the full potential of your Mac and dive into the exciting world of Apple’s ecosystem. Your Apple ID is your key to a seamless digital experience, so create yours today and embark on a journey of endless possibilities!
Conclusion
Creating an Apple ID is the key to unlocking the full potential of Apple’s ecosystem. Whether you’re using an Android device, a Windows PC, an iPhone, an iPad, or a Mac, the process is straightforward and user-friendly. By following the steps outlined in this guide, you can easily create a new Apple ID and gain access to a world of exciting features and services.
One important thing to note is that you can use any of your existing email IDs, including popular providers like Gmail and Yahoo, to create your Apple ID. This means you don’t have to create a new email account just for your Apple ID. Simply use the email address you already have and enjoy the convenience of managing your Apple services alongside your existing communication channels.
With your newly created Apple ID, you can seamlessly access iCloud, iTunes, the App Store, and more, allowing you to explore a wide range of apps, media, and cloud storage options. Take advantage of the powerful features and benefits that come with having an Apple ID, and enhance your digital experience across all your devices.
So, don’t wait any longer! Start creating your Apple ID today and join the millions of users who are already enjoying the incredible possibilities of the Apple ecosystem. Get ready to dive into a world of innovation, convenience, and endless entertainment. Your Apple ID is just a few simple steps away!


