Are you seeking for a quick and simple solution to transfer photos from Android to PC? If so, you’ve come to the correct spot! There are various methods for transferring photos from an Android phone to a PC or Mac, and we’ll go over each one.
Contents
Using a USB Cable
Using a USB cable is one of the simplest methods to transfer files and photos from your Android phone to your computer. This is a simple, quick way that doesn’t need any additional software. To transfer photos using a USB cable, follow these steps:
- Connect your phone to your computer using a USB cable. If your computer has a USB-C port, use a USB-C to USB-C cable. Otherwise, use a USB-C to USB-A cable.
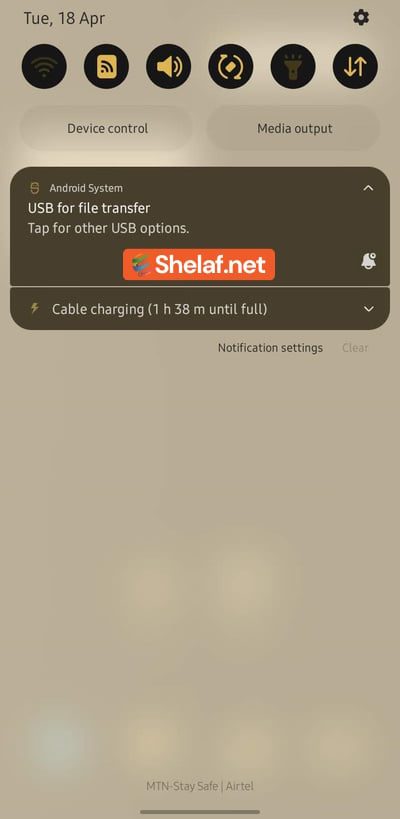
- Unlock your phone and open the notification tray.
- Tap the notification mentioning the USB status. It may say USB charging via USB.
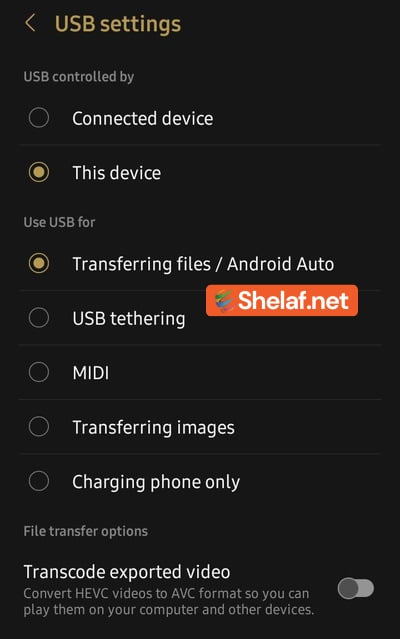
- If you’re using a USB-C to USB-C cable, look for the USB controlled by section at the top and select This device.
- Under Use USB, select Transferring files.
- If prompted, tap Allow on your phone.
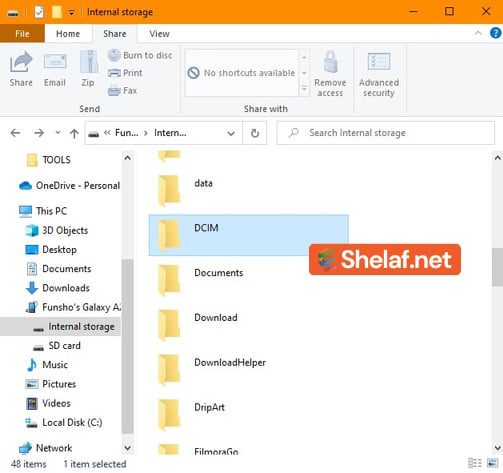
- A file transfer window opens on your computer.
- Browse your folders to drag and drop the photos you want to transfer to your computer. Your camera roll is located in the DCIM folder.
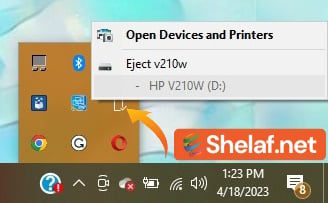
When finished, safely eject your phone from the operating system of your computer and unhook the USB cable.
Using Google Photos
Another simple way to transfer photos from your phone to your computer is to use Google Photos. This method requires an active internet connection, but it’s a great option if you want to retrieve your photos with minimum effort. Here’s how to transfer photos using Google Photos:
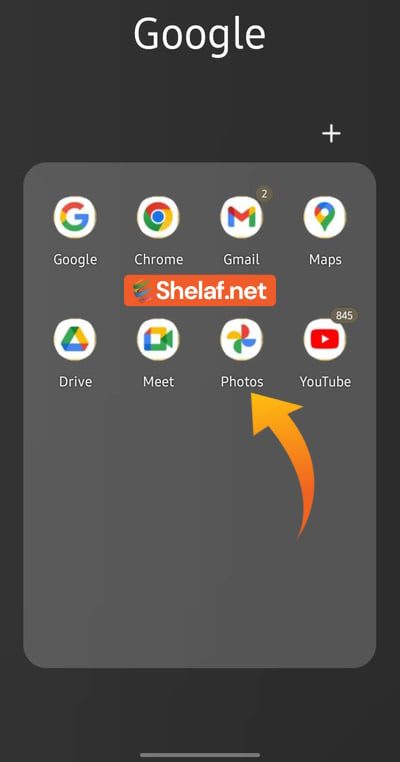
- Download Google Photos on your Android device
- Open Google Photos.
- Tap your profile picture.
- If it says Backup is off, tap Turn on Backup.
- Confirm by tapping Turn on Backup again.
Once your photos are backed up to the cloud, you can easily retrieve them on your computer.
- Using your favorite web browser, navigate to photos.google.com.
- Select the photos you’d like to download.
- Tap the ⋮ overflow menu in the upper-right corner.
- Click Download.
- Google Photos creates a ZIP archive with your selected photos that you can download on your computer.
Using Bluetooth
Bluetooth is a good alternative for transferring a few photos because it doesn’t require cables and works effortlessly across different operating systems. However, it’s not the best option for sending a large number of photos due to its relatively slow transfer speeds. Here’s how to transfer photos using Bluetooth:
Set up Bluetooth sharing on your computer
On a Mac, go to System Preferences, click Sharing, choose Bluetooth Sharing, return to the main System Preferences screen, click Bluetooth, and confirm that your Mac is listed as discoverable.
On a Windows PC, open Windows settings, click Bluetooth & other devices and click Add Bluetooth & other devices to connect your Android devices.
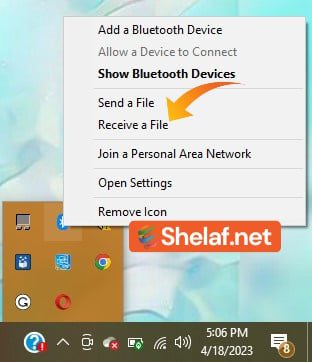
Then, Look for the Bluetooth logo in your desktop tray, put the cursor on it, and right-mouse click. Click Receive a file.
- Now, open your Android phone’s Gallery app.
- Locate the photos you’d like to transfer. If there’s one after the other, press and hold the first one and slide your finger over the others to select them together.
- Tap the Share button.
- Select Bluetooth.
- Tap your computer’s name to initiate the transfer.
- If your devices aren’t linked, you’ll see a prompt on both your computer and phone. Accepting it on both smartphones will pair them.
- On your computer, you could be prompted to approve the incoming transfer.
The photos will be accessible through your computer’s file explorer or Finder once the transfer is finished, at which point you can disconnect your device from the computer. They can be accessed the same way as any other computer file.
If you want to organize your pictures, you can create folders and move your pictures into those folders. This will help you keep your pictures organized and make them easier to find later on.
Transferring photos with third-party apps
If you’re not satisfied with the previous methods or if you’re unable to use them for any reason, you can resort to third-party apps to transfer photos from your Android phone to your computer. Some apps allow you to share files wirelessly, while others offer seamless and faster transfer speeds. Some of the most well-liked third-party programs for transferring photos from your Android phone to your computer are listed below:
Transfer Photos from Android to PC via AirDroid
It is possible to wirelessly transfer files from your Android device to your PC with the AirDroid file transfer program. It is an excellent choice for customers who don’t have access to a USB cable or want to avoid the trouble of connecting and unplugging cables because it enables rapid and simple file transfers without a cable. The program also enables you to send and receive messages, manage files on your device, and even mirror your device’s screen on a computer.
To use AirDroid, download and install the app on your Android phone and computer. Sign in to the app on both devices, and you’re ready to transfer files. To transfer photos, open the app on your phone and select the photos you want to transfer. Tap the Share button and select AirDroid from the sharing options. Select your computer from the list of available devices, and the transfer will begin.
Transfer Photos from Android to PC via Pushbullet
You can transfer files, links, and messages between your Android phone and computer using the flexible app Pushbullet. Additionally, it enables you to send text messages from your computer and receive phone notifications on your computer.
Download and install the Pushbullet app on your PC and Android device to transfer photos using this method. You can transfer files after logging into the app on both devices. On your phone, select the pictures you wish to send, hit the Share button, and then choose Pushbullet from the sharing menu. The transfer will start after you choose your computer from the list of compatible devices.
Transfer Photos from Android to PC via Dropbox
You may save and share files online with the help of Dropbox, a cloud storage service. Additionally, it enables you to easily view photos on your computer by automatically uploading them from your Android phone to the cloud.
Download and install the Dropbox app on both your computer and your Android phone in order to use Dropbox to transfer photos. On both devices, sign in to the app, and turn on the phone’s camera upload feature. A picture you take on your phone will instantly upload to your Dropbox account once you snap it. The picture that is stored on your computer is then accessible by simply signing into your Dropbox account.
Conclusion
Transferring photos from your Android phone to your computer is a straightforward process, and there are several methods you can use to do it. Using a USB cable, Google Photos, Bluetooth, or third-party apps are all viable options depending on your preferences and circumstances. With the steps outlined in this guide, you should be able to transfer your favorite photos from your Android phone to your computer with ease. Whether you want to edit, save, or view your photos on a bigger screen, the methods described in this guide will enable you to do so quickly and efficiently.


